To install LED covings properly, you'll need to start by calculating your power requirements based on strip length and wattage per meter. Select 12V or 24V LED strips and guarantee your power supply exceeds total needs by 20%. Clean mounting surfaces thoroughly, position strips 100mm from ceiling and 50mm from walls, and secure with appropriate adhesive or mounting clips every 30cm. For installations over 5 meters, divide into zones to prevent voltage drop. Proper planning and execution will guarantee a professional, code-compliant lighting solution.
Key Takeaways
-
Calculate power requirements by multiplying LED wattage per meter by total length and add 20% capacity for safety margin.
-
Clean mounting surfaces thoroughly and position LED strips 100mm from ceiling and 50mm from walls for optimal illumination.
-
Use appropriate voltage power supply (12V or 24V DC) and divide installations longer than 5 meters into zones.
-
Secure LED strips with silicone adhesive and mounting clips every 30cm to prevent sagging and ensure durability.
-
Verify all electrical connections, polarity, and voltage ratings before powering up to prevent damage and ensure proper function.
Understanding LED Strip Types and Their Power Requirements

When selecting LED strips for coving installation, you'll need to understand the key specifications that determine their power requirements and compatibility.
First, check the voltage rating - most LED strips operate on either 12V or 24V DC power. You'll need a compatible power supply that matches this voltage requirement.
Calculate your total power needs by multiplying the wattage per meter by your strip length. For example, if you're using a 15W/m strip for 5 meters, you'll need a power supply rated for at least 75 watts.
To guarantee LED strip compatibility, choose a power supply that provides about 20% more capacity than your calculated need.
Remember to verify the current rating (amperage) of your chosen strips and confirm your power supply can handle the load while meeting local electrical codes.
Essential Tools and Materials for LED Coving Installation
Several essential tools and materials must be gathered before beginning any LED coving installation project.
You'll need a measuring tape, wire strippers, electrical screwdrivers, and a voltage tester to guarantee safe installation. For mounting, gather silicone-based adhesive for the coving and double-sided adhesive tape rated specifically for LED strips.
Your toolkit should include wire connectors, a power supply unit matched to your LED strip specifications, and cable management clips.
Don't forget safety equipment: insulated gloves and safety glasses are vital. If you're working with aluminum channels, you'll need a hacksaw with fine-tooth blade for precise cuts.
Keep a multimeter handy to test connections and verify proper voltage output before finalizing the installation.
Planning Your LED Layout and Power Distribution

With your tools and materials ready, proper planning of your LED layout and power distribution becomes the next critical phase.
You'll need to calculate the ideal LED spacing to guarantee uniform illumination without dark spots or excessive brightness. Consider your room's dimensions and desired light intensity when determining strip placement.
Map out your power supply locations, making sure they're within reach of electrical outlets while remaining concealed.
You'll want to divide your LED installation into zones if the total length exceeds 5 meters, as this prevents voltage drop and maintains consistent brightness.
Calculate your total power requirements by multiplying the wattage per meter by your installation length.
Don't forget to account for corners and changes - you'll need connectors or flexible strips to navigate these areas smoothly.
Step-by-Step LED Coving Mounting Guide
Once you've completed your layout planning, mounting LED strips in coving requires careful attention to both positioning and securing techniques.
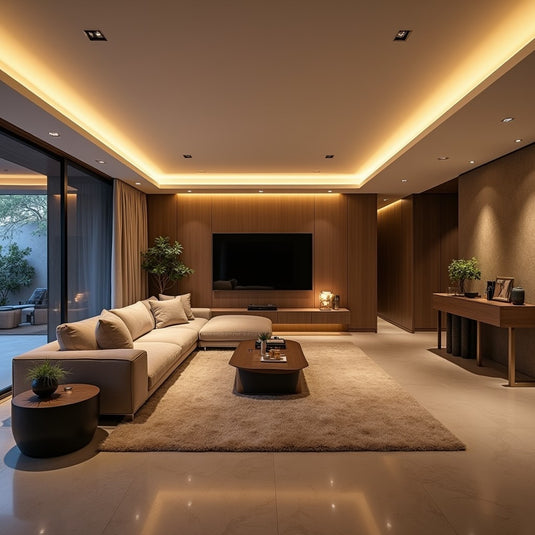
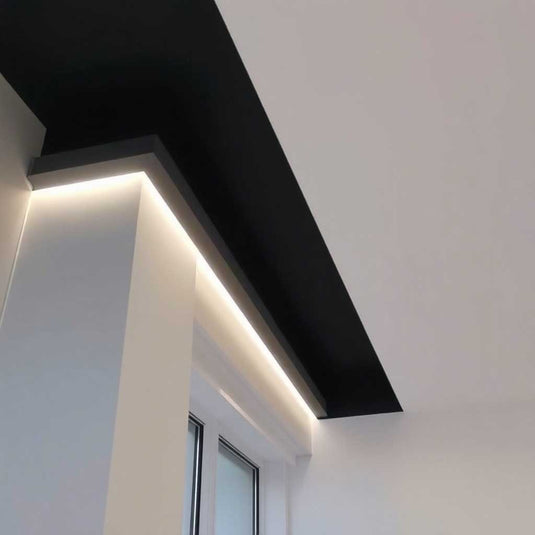
Start by thoroughly cleaning the coving surface to guarantee ideal adhesion. Position your LED strip lighting at least 100mm from the ceiling and 50mm from the wall for optimal light diffusion.
When applying installation techniques, remove the adhesive backing gradually while pressing the strip firmly into place. If your LED strips come with pre-applied adhesive that seems insufficient, reinforce it with additional high-quality mounting tape.
For extra security, consider using mounting clips every 30cm, especially in areas where the strip might sag. Always test each section before proceeding to the next, and confirm all connections are properly secured.
Remember to maintain consistent spacing throughout the installation for professional-looking results.
Electrical Connections and Power Supply Setup

Before powering your LED coving installation, you'll need to properly connect the electrical components while adhering to safety standards and local regulations.
Start by selecting a power supply that matches your LED strip's voltage requirements, typically 12V or 24V DC. Calculate the total wattage needed by multiplying your strip's power consumption per meter by its length.
Make your wiring connections using appropriate gauge cables and guarantee correct polarity. Connect the power supply's positive terminal to the LED strip's positive lead (usually red), and the negative terminal to the negative lead (usually black).
If you're using a dimmer or controller, wire it between the power supply and LED strip. Double-check all connections before applying power, and use wire nuts or terminal blocks to secure exposed wiring.
Test the system at low brightness first to verify proper operation.
Troubleshooting Common LED Installation Issues
Despite careful installation, LED coving systems can experience several common issues that require systematic troubleshooting. When you encounter problems, start by checking power connections and voltage ratings to verify they match your LED specifications.
| Issue | Possible Cause | Solution |
|---|---|---|
| LED strip flickering | Loose connections | Secure all wire connections |
| Uneven brightness | Voltage drop | Install power supply closer |
| Dead sections | Cut damage | Replace damaged section |
| No power | Improper connections | Verify polarity and voltage |
You'll want to check your power supply's output voltage using a multimeter if you notice inconsistent performance. Most LED strip issues stem from incorrect power calculations or loose connections. Remember that different sections of your coving might require separate power injection points to maintain consistent brightness throughout the installation.
Maintenance and Safety Tips for LED Coving Systems

While LED coving systems are designed for longevity, proper maintenance and safety protocols are essential for ideal performance and risk prevention.
You'll need to implement regular maintenance practices, including dusting your LED strips every three months and checking for loose connections or signs of wear.
For safety precautions, always disconnect power before performing any maintenance work.
You should inspect the transformer and wiring annually for signs of overheating or damage. If you notice any discoloration, dimming, or flickering, address these issues immediately to prevent potential hazards.
Remember to keep your LED strips' temperature within the manufacturer's recommended range and guarantee proper ventilation within the coving.
Don't attempt repairs without proper knowledge - consult a qualified electrician if you encounter electrical issues beyond basic maintenance.
Frequently Asked Questions
Can LED Strips Be Installed Around Corners Without Breaking the Circuit?
Yes, you can install LED strips around corners while maintaining circuit integrity by using flexible connectors or corner clips. Just make certain you don't bend the strip too sharply, which could damage the internal connections.
How Long Can LED Strips Stay on Continuously Without Overheating?
Quality LED strips can run 50,000+ hours continuously. You'll need proper heat dissipation to achieve this lifespan. Keep your strip's temperature below 75°F using aluminum channels and don't exceed the manufacturer's recommended runtime.
Do LED Strips Attract Insects When Installed Outdoors in Covings?
You'll find that LED strips attract fewer insects than traditional outdoor lighting since they emit minimal UV radiation and heat. However, warm white LEDs can still draw some insects to your outdoor covings.
Will LED Strips Damage Paint or Wallpaper Over Time?
Like a gentle breeze, quality LED strips won't harm your walls. However, you'll want to check your strip's heat output and verify proper installation with adequate ventilation to maintain paint compatibility and LED strip longevity.
Can I Use My Existing Dimmer Switch With LED Coving Installations?
You'll need a LED-compatible dimmer switch for your coving installation. Your existing dimmer switch types likely won't work properly and could damage your LEDs. Consider upgrading to a specifically designed LED dimmer instead.
Conclusion
You've now learned the essential steps for professional LED coving installation. When properly installed, LED systems can transform spaces dramatically - as demonstrated in a recent office renovation where dimmable LED covings reduced energy costs by 35% while providing adjustable ambient lighting. Remember to follow electrical codes, verify power calculations, and maintain proper wire connections. Regular maintenance checks will guarantee your LED coving system operates safely and efficiently for years to come.